
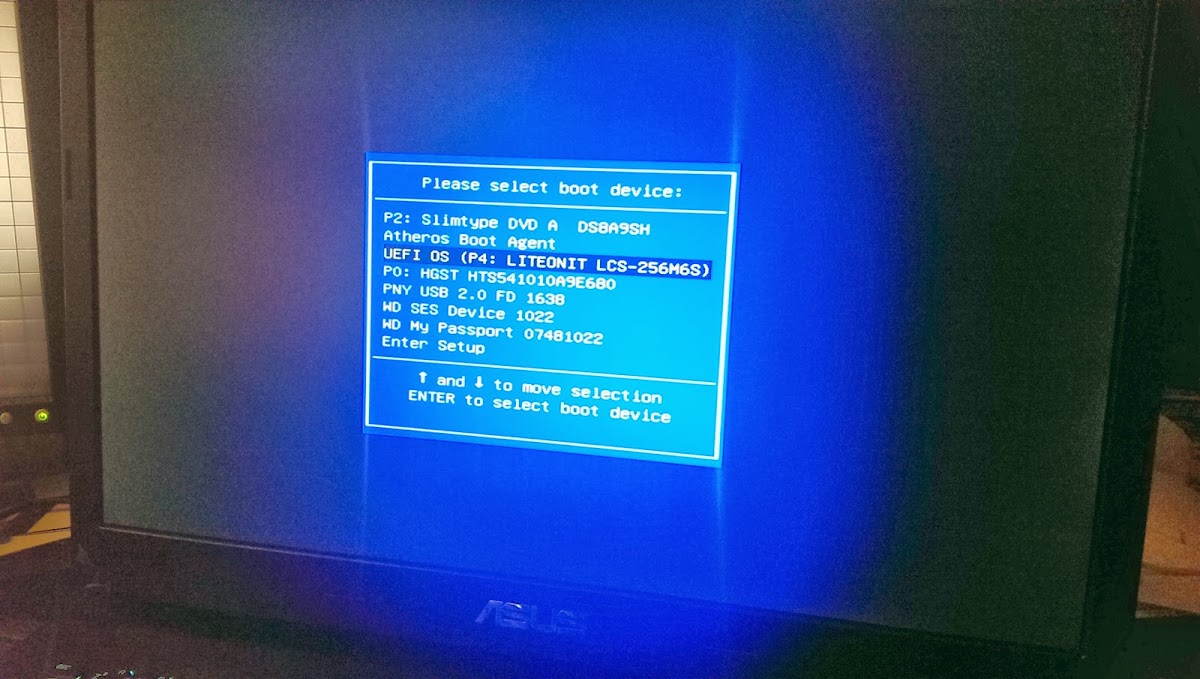
BIOS SETTINGS
go to ADVANCED and disable VT-d
go to BOOT and disable Fast Boot
Underneath Fast Boot, enable Launch CSM
You should now see a new option: Launch PXE OpROM policy. Enable this option. This allows your computer to boot via Legacy BIOS not UEFI.
INSTALLATION:
Standard Unibeast preparation:
1. On a mac download the Mavericks installation from App Store
2. Follow the steps for Unibeast and create a USB stick - Select Laptop support in addition to OSX 10.9 Mavericks App Store install
3. Once you have created and finished Unibeast USB stick preparation make sure you download the patched 10.9 kernel from step 13 and replace the mach_kernel on the USB stick with the one you download (you might have to show all files in OSX you are working on to see mach_kernel file on the root of USB drive), put the USB stick into your ASUS 750JX and boot from it
4. On bootloader screen, pick Unibeast Installer (no flags needed) and hit enter
5. It will take a bit, so be patient and OSX installer will show up
6. Go to Disk Utility > Do the standard Create Partition on a second drive > Make it GUID Partition > MacOS Extended Journaled and call it Mavericks
7. Exit Disk Utility and continue with installation

8. Once the installation finishes you will get a message how OSX Mavericks can't set the startup disc. This is FINE! Don't worry.
9. Now, restart and boot back into Windows 8
10. Install in Windows 8 NFS+ support
11. Restart and boot again into Windows 8
12. Once you have booted into Windows 8 now you should see the Mavericks volume and all the files there
13. Download this patched kernel (UPDATE: this is now recommended patched kernel by RehabMan: Haswell early reboot, Mavericks, locked MSRs, and HP Envy 15-J063CL (i7-4700MQ) ) as it allows Sleep and UseKernelCache to work properly (OLD one - do not use this unless you have problems with RehabMan's http://www.osx86.net/files/file/3631...ricks-109-amd/ )
14. Open Mavericks volume in Explorer and overwrite mach_kernel with the one you downloaded
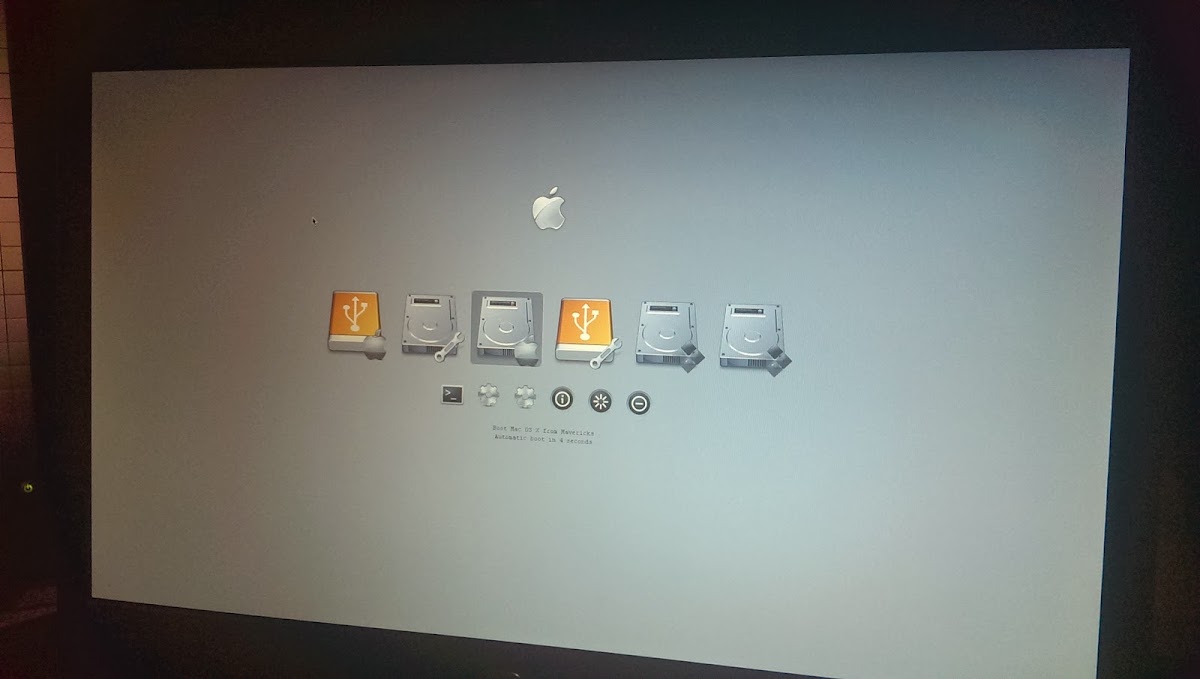
15. Restart and boot from the USB stick
16. Pick OSX Mavericks HDD volume and hit enter
17. OSX Mavericks will welcome you with the setup screen - follow through on standard process (iCloud might give you a funky message but that's not a big deal)

18. Welcome to OSX Mavericks on ASUS G750JX!


UPDATE:
Once you install the Mavericks you want to run the latest Multibeast 6.0 (see TonyMac) before the restart.
What you will be installing is the following:
The idea here is to have Chameleon and everything else installed into S/L/E, modify the SMBIOS.plist and have local hdd Extra folder.
If you are going to use Clover as boot see install notes in the post later in this thread so you can take out USB stick booting completely and adjust some location of some kexts and how to use the config file I included in the files.
Thanks to PeanutButterSpice and slayer2333 from TonyMac forums for trying as well on this and giving me ideas on what to do to get this working without it I would have probably not been able to look at the right place to make this work.
UPDATE 01:
Got audio and wifi working fine now!
The trick was that ASUS G750JX is using Broadcom chip.. in order to to make it recognized in Mavericks you have to update the IDs in the IO80211Family kext.. You go in and go into Plugins and update the IDs inside AirPortBrcm4360.kext > info.plist to include the following:
<string>pci14e4,43b1</string>
<string>pci14e4,4331</string>
<string>pci14e4,4353</string>
<string>pci14e4,432b</string>
Adding these will enable your Wifi.
The audio is working with VoodooHDA 2.84.
The problem I'm having is with hardware acceleration on GTX770M.. the card it properly recognized and working just fine but when I play videos HTML5 or Flash it doesn't matter it crashes it.. I can watch videos just fine if I disable hardware acceleration in Flash but H.264 HTML5 videos will not work for some reason.
Suggestions are welcome!
CUDA installs fine though.
UPDATE 2:
And I finally solved the last issue with hardware acceleration. I changed the System Definition to Mac Pro 5.1 and now everything works great.
The only last thing that remains is to get BIOS to recognize the SSD with the OSX Mavericks installation so I can boot without the USB stick boot loader. But that's really a minor issue.
Amazing! This ASUS G750JX is now an OSX Mavericks BEAST!
UPDATE 3:
The loading without the USB stick has been resolved now. I am using Clover. I will write up the guide for this as I'm still fine tuning things.
UPDATE 4:
I have used RehabMan's patched kernel (here: Haswell early reboot, Mavericks, locked MSRs, and HP Envy 15-J063CL (i7-4700MQ)) and indeed things are working MUCH better. UseKernelCache is working and I have increased my boot times now to desktop in about 10 secs instead of 30+. One side effect is that I don't see USB 3.0 recognized after installing GenericXHCI kext. Looking into this.
UPDATE 5:
Bluetooth 4.0 is now working as well. You have to enable the ASUS G750JX broadcom bluetooth IDs in BroadcomBluetoothTransport kext. We are fortunate because the Bluetooth in this laptop is BCM4352 so it's compatible fully with OSX Mavericks.
To enable go:
0. Find the IOBluetoothFamily.kext in S/L/E and copy it to desktop
1. Show Package Contents on it
2. Go into Plugins and show package on BroadcomBluetoothTransport
3. Open info.plist file and locate this entry:
<key>Broadcom2045FamilyUSBBluetoothHCIController_P </key>
<dict>
<key>CFBundleIdentifier</key>
<string>com.apple.iokit.BroadcomBluetoothHostContr ollerUSBTransport</string>
<key>IOClass</key>
<string>BroadcomBluetoothHostControllerUSBTranspor t</string>
<key>IOProviderClass</key>
<string>IOUSBDevice</string>
<key>idProduct</key>
<integer>33293</integer>
<key>idVendor</key>
<integer>1452</integer>
</dict>
4. Right above this entry and after
<key>IOKitPersonalities</key>
<dict>
(So in between those put the following)
<key>Broadcom2046FamilyUSBBluetoothHCIController_3 404</key>
<dict>
<key>CFBundleIdentifier</key>
<string>com.apple.iokit.BroadcomBluetoothHostContr ollerUSBTransport</string>
<key>IOClass</key>
<string>BroadcomBluetoothHostControllerUSBTranspor t</string>
<key>IOProviderClass</key>
<string>IOUSBDevice</string>
<key>LMPLoggingEnabled</key>
<false/>
<key>idProduct</key>
<integer>13316</integer>
<key>idVendor</key>
<integer>5075</integer>
</dict>
5. This is it, SAVE and use Kext Wizard or similar to install and overwrite the existing IOBluetoothFamily.kext in S/L/E
6. Reboot and voila.. You have Bluetooth 4.0
UPDATE 6:
So, the progress so far is following:
1. GPU works natively QE/CI (Superb performance)
2. Hardware acceleration issue resolved (I am now using SMBIOS iMac14,2). I have modified the AppleGraphicsPowerManagement kext to include iMac14,2 profile and used Mac Pro 5,1 GPU settings there in order to get the hardware acceleration working. Works great now (power management though might be iffy and probably blasting the GPU at full speed - I don't care about this and it works great but it might be an issue for you if you are planning on using this laptop unplugged as a "portable" laptop - this laptop is anything but portable
)3. Touchpad works (albeit no gestures) - I tried Elan Touchpad drivers for OSX and patching that and works great and all but the gestures and touchpad is not the amazing pinnacle of technology so it works wonky, gestures don't get recognized properly and the way these guys made these gestures they are just weird so I took it off. Also I had issues with left and right touchpad buttons not working. I'm using standard VoodooPS2Controller by Rehabman for Synaptics now and it works great. No gestures but I guess it works as it should. I mean I have mouse plugged in anyhow. For those rare instances where I need to have touchpad running this is more then great.
4. Wifi/Bluetooth/Ethernet all work (see previous updates)
5. SD Card works awesome.. Recognized just fine (but with some adjustments in AppleStorage kext)
6. Thunderbolt not recognized - still try to see if I can make this work (haven't even tried yet)
7. Battery/Charging information (not really working - I included the battery kext from someone - I think it's also Rehabman but it's not working properly as it requires some DSDT fixes to be unique - I'll look more into this - not a prirority now as I use my G750 plugged in nonstop wherever I go)
8. Power Sleep/Shutdown/Restart works - you lose backlight on keyboard and it's a bit wonky but it works. I think it also reacts to the lid being down and turns it off but I find it to be a bit wonky overall.. Well better working than not I guess no matter how.
9. USB 3.0 is fully recognized (it was never really a problem - I messed with settings in BIOS and I lost it.. make sure you put XHCI under USB to SmartAuto)
10. Haven't tried HDMI/displayport outputs so can't tell you if it's working or not but assuming the GTX 770M is fully recognized natively without patching anything I would say it probably works fine.
11. SSD TRIM recognized fine.
12. Sound works fine with VoodooHDA 2.8.4 and PreferencePane but it will cut out after sleep (look for VoodooHDA deamon to get that resolved - I haven't installed deamon so can't confirm)
That's about it though.. I think we are like 99% fully operational with some trade-offs but if you live with those (I think they are not a huge deal considering what this laptop is and how you use it).
I am including in this update all my files in the first post as I have patched (kexts, smbios.plist, mach_kernel mentioned in the initial install just in case Rehabman's url goes down and Clover config file).
FILE ATTACHMENTS:
My kexts, smbios and config files you need (if you have ASUS G750JX this should work without issues for you as I expect them to be the same)
ASUS G750JX OSX Mavericks files
UPDATE 7:
Okay.. so with ASUS G750JX and Rehabman's kernel the GPU is running at cool 40 degrees most of the time. But I had issues with the CPU running at x32 at full 3.2Ghz non-stop as Rehabman noticed.. NOT GOOD..
So I used AppleCPUPowerManagement kext from Mountain Lion 10.8.5 and it's working like a charm now.. Powermanagement is working awesome and idling the CPU and turbo-ing when needed.. The CPU is now cool as ice at 30-40 degrees when idle and goes full turbo 3.2ghz when working.
Here's the patched AppleCPUPowerManagement.kext from my ASUS G750JX
http://www.bozzified.com/downloads/A...ement.kext.zip
Now keep in mind that if you are not using Clover you will need to boot with USB Flash drive and then pick your OSX Mavericks install to go through Chameleon.
Brief CLOVER usage:
CLOVER INSTALLATION AND FILES
1. Download latest Clover http://sourceforge.net/projects/cloverefiboot/
2. Download Clover Configurator (you will need this) http://www.osx86.net/files/file/49-c...atorconverter/
3. Run installer on Clover and pick the following:
- Install for UEFI Motherboards
- Themes (pick BOOTCAMP)
- Under Drivers64UEFI check CSMVideoDxe-64 and OsxAptioFixDrv as the only to things from there
- Install Clover Preference (for updates to Clover)
Now where to install (you need to pick the location).. Well I have done it both ways but i will give you my take.
Initially I went into Disk Utility and made additional partition on my Mavericks drive. I called this Clover partition and I formatted it as NFS Journaled. It's fine as this is just for accessing the actual EFI files so it can be whatever but suggested is MS-DOS (FAT) and NFS Journaled will work the same. Once you add that partition (make it the smallest it can be - right now I believe that's 1gb)
The reason I did this is because Clover will install EFI onto this partition at the boot record level and you won't really see anything. The reason I created this partition was that if something goes wrong I could just kill the partition without affecting my Mavericks installation. The disadvantage is you lose a 1gb of space.
Once I played around with Clover and saw how it works and it worked good, I eventually decided to install Clover directly onto my Mavericks partition. Same thing really but if you want to remove it - it will be harder (don't see why you would want to but that's up to you)
So , I will assume you chose to install Clover on your same partition as Mavericks installation. If that's the case:
Then INSTALL Clover with above mentioned settings to Mavericks partition and click through OKs.
Now, when you have done this, you need one more thing..
1. Run Clover Configurator and in the menu find option Mount EFI
2. When you do that you will basically mount EFI files and configs to be visible in OS so you can change them
3. You should see now EFI volume pop up in Finder
4. Open it, go to CLOVER and replace the config.plist file with the ones I included in the zip file.
5. Once you have done that, go ahead and copy all kexts I included for you in the file as well into the EFI/CLOVER/kexts/10.9 folder and copy them there. These are the kexts clover will use similar to how Chameleon does it with Extras.
Now you can reboot (under the condition you installed these kexts I included with Kext Wizard into your S/L/E as well) and you should see Clover boot screen that looks awesome!
Now you can take out your USB stick with Unibeast and rock it from there.


0 Comments